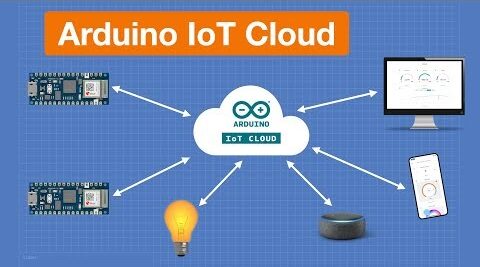
The Arduino IoT Cloud is a platform that allows users to connect and manage IoT devices. Amazon Alexa, on the other hand, is a popular voice assistant that can be used to control various devices. In this blog post, we will explore how to integrate the Arduino IoT Cloud with Amazon Alexa.

Components and supplies
- Resistor 220 ohm
- LED RGB common cathode
- Arduino MKR WiFi 1010
- Jumper wires (generic)
- High Brightness LED, White
- Breadboard (generic)
- Arduino MKR ENV Shield
Apps and platforms
- Arduino IoT Cloud
- Arduino Web Editor
- Amazon Alexa Official Arduino Skill
Step 1: Set up the Arduino IoT Cloud
Before we can integrate with Amazon Alexa, we need to set up the Arduino IoT Cloud. This involves creating an account on the cloud platform and registering our Arduino board. Follow the steps outlined on the Arduino IoT Cloud documentation page to set up your account and register your board.
Step 2: Create an Amazon Alexa Skill
Next, we need to create an Amazon Alexa skill. To do this, go to the Amazon Alexa developer console and create a new skill. Give your skill a name, and choose “Custom” as the model type. Under “Invocation Name,” choose a name for your skill, such as “My Home Automation.”
Step 3: Add Intent
Once you have created the skill, add an intent. An intent is a set of possible user requests that your skill can handle. For example, we might create an intent called “TurnOnLight” to handle requests to turn on a specific light.
Step 4: Set up the Endpoint
The next step is to set up the endpoint that will handle requests from Amazon Alexa. We will use the Arduino IoT Cloud’s REST API to communicate with our Arduino board. To set up the endpoint, we need to provide the URL of the REST API endpoint and the authentication credentials.
const char* server = “api.arduino.cc”; const int httpsPort = 443; const char* fingerprint = “98:A4:ED:DD:21:8F:70:78:98:1F:E7:EB:44:8B:84:9C:56:FC:14:7C”; const char* accessToken = “YOUR_ACCESS_TOKEN_HERE“;
Replace YOUR_ACCESS_TOKEN_HERE with the access token you generated when you registered your Arduino board on the IoT Cloud.
Step 5: Write the Code
Now we are ready to write the code that will handle requests from Amazon Alexa. The code will listen for requests to our intent and then send a message to the Arduino IoT Cloud to control our devices.
#include <WiFiNINA.h> #include <ArduinoIoTCloud.h> #include <Arduino_ConnectionHandler.h> const char* ssid = “YOUR_WIFI_SSID_HERE”; const char* pass = “YOUR_WIFI_PASSWORD_HERE”; const char* server = “api.arduino.cc”; const int httpsPort = 443; const char* fingerprint = “98:A4:ED:DD:21:8F:70:78:98:1F:E7:EB:44:8B:84:9C:56:FC:14:7C”; const char* accessToken = “YOUR_ACCESS_TOKEN_HERE”; void setup() { Serial.begin(9600); while (!Serial); WiFi.begin(ssid, pass); while (WiFi.status() != WL_CONNECTED) { delay(500); Serial.print(“.”); } ArduinoCloud.begin(ArduinoIoTPreferredConnection); setDebugMessageLevel(2); ArduinoCloud.printDebugInfo(); } void loop() { ArduinoCloud.update(); } void TurnOnLight() { ArduinoCloud.writeCloudString(“light_state”, “ON”); }
In this example, we listen for requests to the “TurnOnLight” intent. When a request is received, we call the TurnOnLight() function, which sends a message to the Arduino IoT Cloud to turn on the light.
